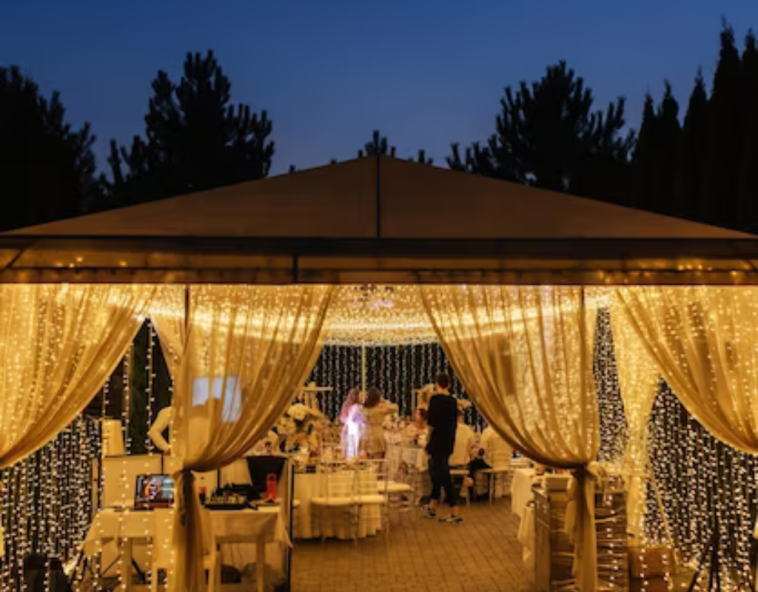
Have you ever gazed upon a beautifully lit outdoor space and wished you could recreate that enchanting atmosphere in your own backyard or patio? Well, you’re in luck! String lights can work wonders, turning any ordinary area into a captivating oasis of twinkling magic. Whether you want to host charming garden parties or simply enjoy a cozy evening under the stars, string light installation is the key to transforming your space.
Crafting Your Outdoor Sanctuary: The Art of String Lights installation
Elevate your outdoor living experience to a whole new level with the captivating allure of perfectly installed string lights. Whether you’re dreaming of cozy evenings under a starlit sky or hosting memorable gatherings with friends and family, this step-by-step guide is your key to transforming any space into a magical oasis. With careful planning and creative execution, you can create an enchanting ambiance that’s both inviting and mesmerizing. Let’s dive into the world of string lights installation and illuminate your outdoor haven.
Step 1: Planning Your Installation
Before you dive into installing your string lights, take some time to plan. Consider the layout of your space, the type of atmosphere you want to create, and the power source for your lights. Are you going for a romantic, intimate vibe or a festive, celebratory one? These factors will help you determine the design and layout of your string lights.
Step 2: Gather Your Tools and Materials
To ensure a smooth installation process, gather the necessary tools and materials. You’ll typically need:
String lights (choose weather-resistant options for outdoor use)
Extension cords (if needed)
Screw hooks or adhesive clips
A ladder
Measuring tape
Outdoor-rated electrical tape
A power source (outdoor electrical outlet or portable generator)
Step 3: Map Out Your Design
With your plan in mind and tools at the ready, it’s time to map out your string light design. Measure the length of your space and calculate how many string lights you’ll need. Pay attention to spacing; you don’t want them too close or too far apart. Sketching a rough design on paper or using string to outline the path can be helpful.
Step 4: Secure the Anchors
This step is crucial for a safe and sturdy installation. Attach screw hooks or adhesive clips to the anchor points you’ve identified. These could be trees, posts, walls, or any other stable structures. Make sure they’re securely fastened, as they will bear the weight of the lights.
Step 5: Hang the String Lights
Now comes the fun part! Carefully hang the string lights along the path you’ve designed, making sure they are evenly spaced and secure. If you’re working with multiple strands, connect them following the manufacturer’s instructions. Use outdoor-rated electrical tape to seal connections and protect them from the elements.
Step 6: Test the Lights
Before you bask in the glow of your creation, take a moment to test the lights while String Light Installation for proper functionality. Plug them in, make any necessary adjustments, and address any issues promptly for a flawless outdoor oasis. Your diligence now will save you from trouble that can cause later on.
Step 7: Enjoy the Ambiance
With your string lights installed and tested, it’s time to sit back, relax, and enjoy the enchanting ambiance you’ve created. Whether it’s a quiet evening with loved ones or a lively gathering with friends, the warm, twinkling glow of your string lights will set the perfect mood.
Maintenance Tips
To keep your string lights looking their best, here are some maintenance tips:
Regularly inspect for loose bulbs or damaged wires and replace them promptly.
Clean the bulbs and strings as needed to remove dirt and debris.
Turn the lights off in day so that it will work well in night and enhance durability.
Protect the lights from harsh weather conditions by taking them down during storms or extreme temperatures.
Step 8: Invest in a Timer or Smart Control
To simplify the operation of your string lights, consider investing in a timer or smart control system. These devices allow you to set specific on/off times, ensuring your lights automatically come to life as the sun sets and turn off when you desire. It’s a convenient way to enjoy your outdoor oasis without the hassle of manual operation.
Step 9: Create Variations in Height
To add depth and visual interest to your string light display, vary the height at which you hang the lights. Mix in different anchor points or use poles of varying heights to create a dynamic and enchanting atmosphere. This technique adds a touch of creativity and sophistication to your lighting design.
Step 10: Customize with Bulb Styles and Colors
String lights come in a variety of bulb styles and colors, allowing you to customize the ambiance to suit your preferences. Consider using Edison-style bulbs for a vintage, rustic feel or colored bulbs to match a specific theme or season. Mixing and matching bulb styles and colors can give your outdoor space a unique and personalized touch.
To Conclude all
String light installation is a fantastic way to transform your space into a magical oasis. With careful planning and execution, you can create an enchanting atmosphere that enhances any outdoor area. So, gather your tools, let your creativity flow, and start illuminating your space with the mesmerizing charm of string lights.
These twinkling lights not only add aesthetic appeal but also extend your outdoor living hours, providing a cozy and inviting atmosphere for gatherings or quiet evenings. As you embark on this illuminating journey, our comprehensive guide will walk you through the process, ensuring your outdoor sanctuary radiates with the captivating magic of perfectly installed string lights. Get ready to redefine your outdoor space and bask in its newfound charm.
Make your home a heaven with this magical lights. Your dream outdoor oasis is just a few steps away!


