
Learn a simple and effective approach that you can adopt to attach MDF file to existing database in a hassle-free manner.
Microsoft SQL Server is an essential application for organizations & businesses as all the critical data are stored in it. In the technology field, it is the best and successful relational database management system that provides highly integrated services to manipulate the database over the server.
SQL Server uses different types of database files – MDF file also known as primary database file, which is utilized to save all the data including tables, views, stored procedures, functions, triggers, indexes, etc. And another is log file or LDF file, which saves all the transactional information of the primary database file. Sometimes users want to attach MDF file to existing database due to some reasons. But this task can be a big headache for the users as there is no manual method to do so.
Here, in the following segment, we are going to discuss a simple approach that will help users to attach MDF file to existing database easily.
So, let’s see,
Well-Rounded Approach to Attach MDF file to Existing Database
Use PCVITA SQL Database Recovery software to attach MDF file to existing database in SQL Server. It is an advanced tool which has the potential to repair damaged or corrupt MDF file and export the recovered database file to an existing database or as a new database. Moreover, this software has a self-explanatory and easy-to-use interface that a novice user can also operate without any prior technical knowledge.
Follow this step by step guide to attach MDF file to existing database
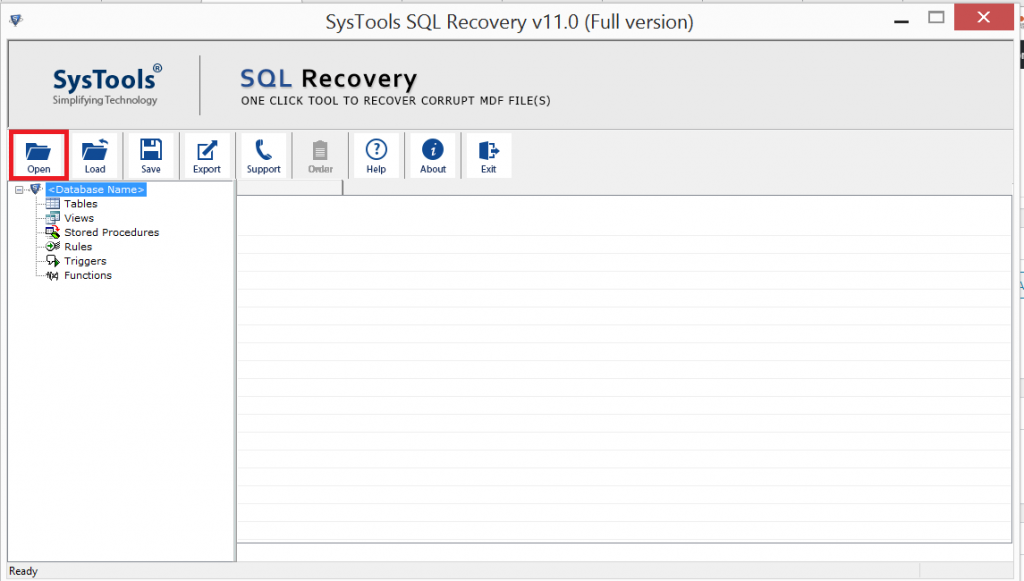
Step 1. Download and Run the tool on your system and click on Open to load the desired MDF file.
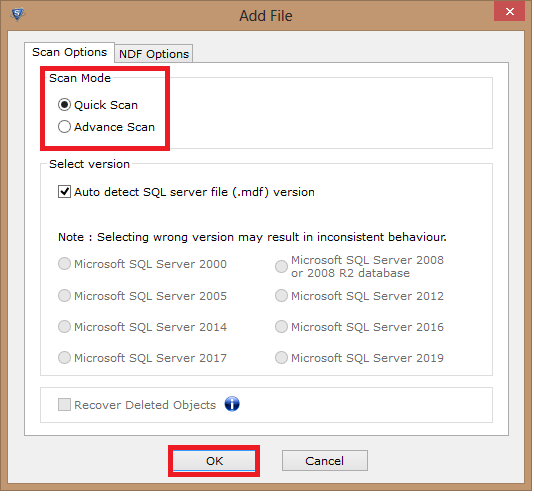
Step 2. Choose the Scan Mode for scanning the file and select a version of the MDF File. You can also check the recover deleted database objects option.
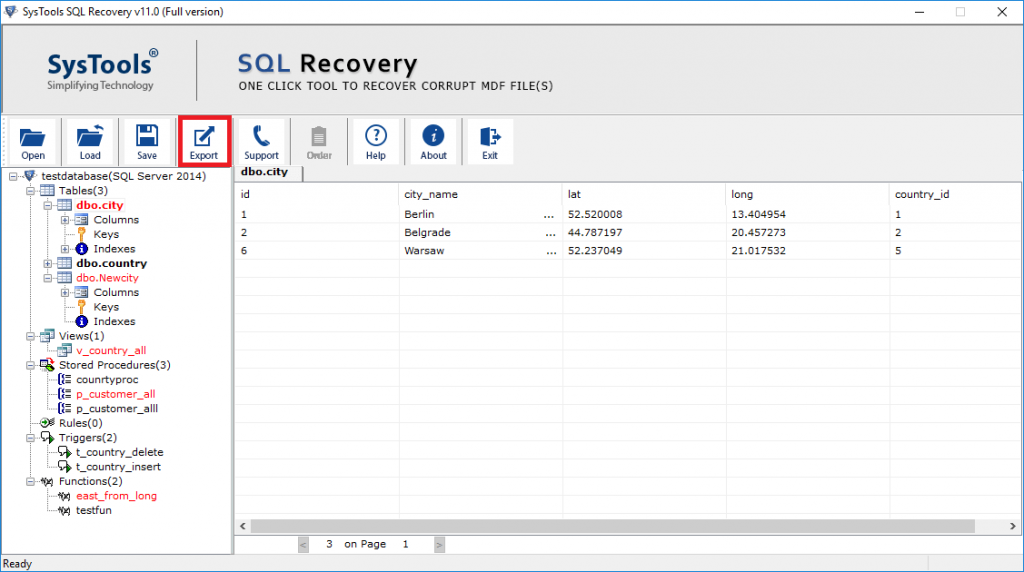
Steps 3. Once the scanning process gets completed preview the database objects such as- triggers, rules, tables, views, stored procedures, etc., and then click the Export button to export the MDF file into the existing database.
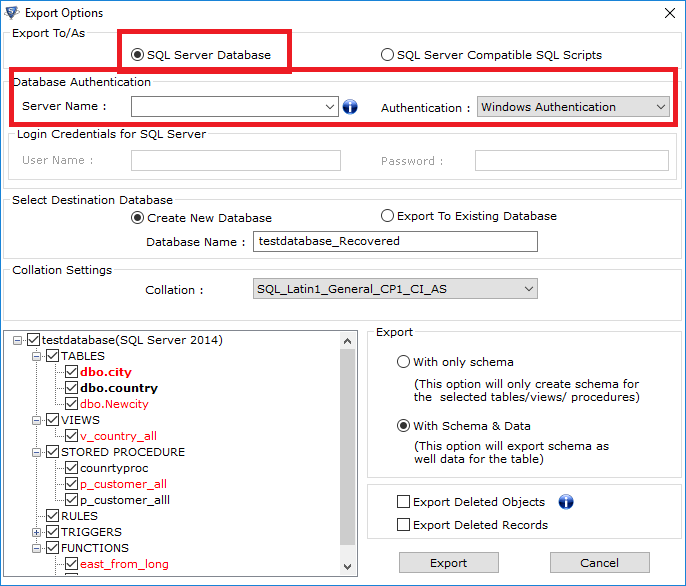
Step 4. Now, to attach MDF file to existing database, select Export as SQL Server Database option. Under Export as SQL Server Database, fill Server Name & choose Authentication type either Windows Authentication or SQL Server Authentication.
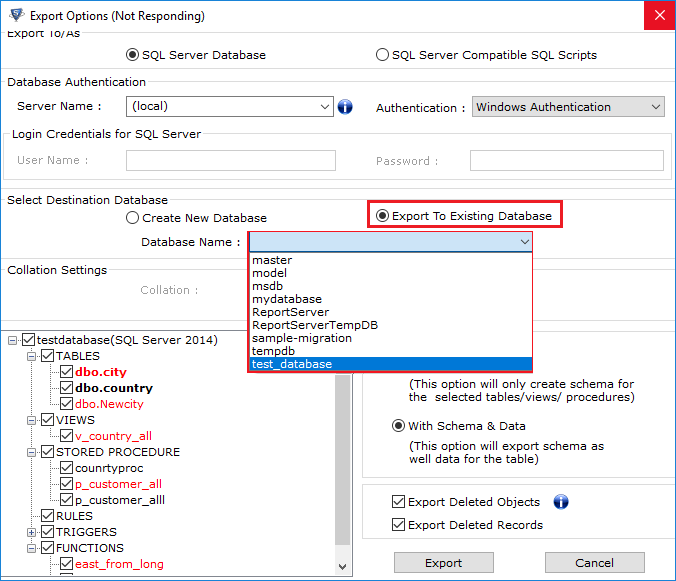
Step 5. Choose Export to Existing Database option.
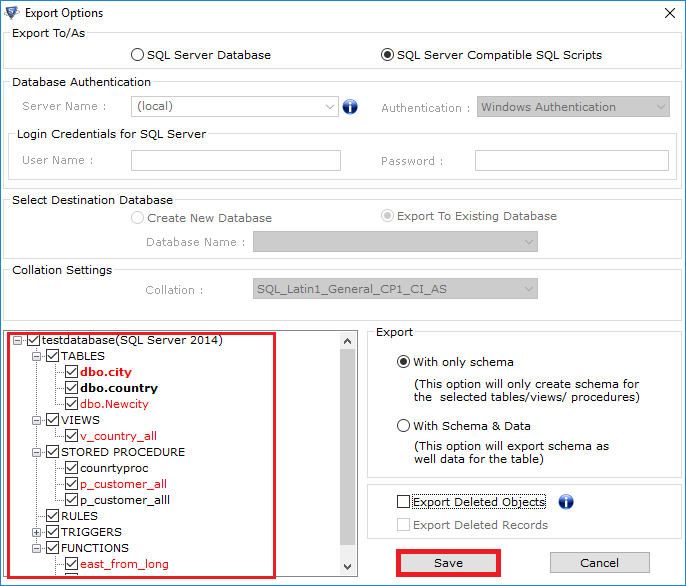
Step 6. Select the desired database items you want to attach and hit the Export button to begin the process.
Features of SQL Database Recovery Tool
- A simple graphical user interface and easy to use for non-technical users.
- Recover data from corrupt MDF and NDF files and directly export to the SQL Server Database.
- Supports to repair multiple NDF database files at once.
- Preview of recovered MDF file data items like tables, functions, views, triggers, etc.
- Displays preview of deleted data in red color.
- Recover deleted SQL Database objects and table records.
- Supports Microsoft SQL Server 2019, 2017, 2016, and below version.
Concluding Lines
At some point, you might experience the need to attach MDF file to existing database. This task requires a lot of time & effort if you do not know the right procedure. Therefore, in this write-up, we have described a simple and reliable approach in a detailed manner that will resolve all the problems faced by users while attaching the MDF file to SQL Server.
For prior evaluation, a free demo version of the software is also provided. You can download the free edition and check the working of the tool.